A leaking PVC line needs more than a replacement fitting: the failure must be located, classified, documented, repaired and tested in the correct order. By the end, you will know what evidence to collect, which details to send to a manufacturer, and how to verify that the repaired section is safe to return to service.
Key takeaways
- Isolate the line, stop the pump, release pressure, and photograph the leak first.
- Check the pipe wall, socket, threaded fitting, and nearby supports separately.
- Provide photos, pipe size, batch details, pressure, temperature, and installation history.
- Pressure-test the repaired line before returning it to service.
Start with isolation, site evidence and a structured leak search
Shut the isolation valve, stop the pump, and switch off nearby electrical equipment before touching the leaking line. Open a downstream tap to release trapped pressure; cutting or loosening a pressurised PVC joint can turn a small leak into a sudden spray. Photograph the leak before cleaning or dismantling anything.
Record the evidence in this order:
- Note the pipe’s outside diameter, nominal size, pressure class, and whether the joint uses solvent cement, a rubber ring, threads, or a compression fitting.
- Photograph the full route, the leak close-up, nearby supports, valves, fittings, and any impact marks, gouges, heat damage, or discolouration.
- Record the operating pressure, pump start-stop pattern, valve-closing action, and whether the leak appeared after a pressure surge.
- Check the water meter with every outlet closed, then inspect damp patches, staining, mould, wet soil, and air entering a suction line.
- Dry the area and follow the line from the last dry point, checking sockets, elbows, tees, valves, threaded adaptors, and clamps before exposing concealed pipe.
A pipe-wall pinhole or longitudinal split points toward impact, excessive stress, chemical or heat damage, or a pressure event; water at a socket or fitting points first to insertion, alignment, cement, contamination, or a seal.
A leak proof pvc pipe in nagpur still depends on matching fittings, sound support, correct joint preparation, and a later pressure test. Do not replace the pipe until the failure location and surrounding evidence are documented.
Tell a pipe-wall failure from a joint or fitting leak
The exact failure is identified by tracing where water first appears after the line is isolated and dried. The wettest point is not always the source: water can travel along a pipe, clamp, wall chase or insulation before dripping.
Wipe the exposed section dry, pressurise the line briefly, and watch the first bead form. Use a bright light and tissue around each suspect point.
- A longitudinal split, pinhole or burst area in the smooth pipe wall indicates pipe-body damage. Look for impact marks, crushing, bulging, abrasion or a split running along the pipe.
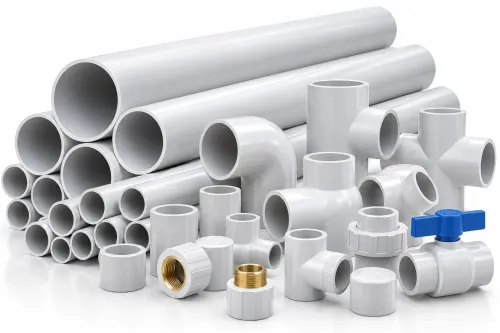
- Water emerging from a socket, elbow, tee or coupler indicates a joint leak. Check incomplete insertion, poor alignment, contamination, insufficient solvent cement or a socket crack.
- A threaded-adaptor leak usually begins at the thread or shoulder, not along the pipe wall. Inspect for cracked plastic, damaged threads and excessive tightening.
- A rubber-ring joint leaks at the spigot-and-socket interface. Look for a displaced, cut, hardened or dirty seal, and confirm that the pipe has reached its insertion mark.
- A valve, saddle or fitting leak remains local to that component. A loose clamp can create a wet patch without damaging the pipe.
For a 2 inch upvc pipe in nagpur, record the actual outside diameter, tolerance, pressure class, wall series and joint type before comparing fittings. The inch label alone cannot confirm compatibility; a coupler with the wrong dimensional system can look correct while leaving a poor sealing fit.
A pressure drop with no visible wetting points to a concealed leak, trapped air, a leaking valve or a suction-side entry point. Map the first pressure loss and inspect buried routes for damp soil, staining or mould.
Give the manufacturer enough evidence to identify the cause
A wet socket does not prove a defective pipe. Give a plumbing PVC pipe manufacturer in Nagpur the failed section, clear photographs before dismantling, and records that show what the line experienced in service.
- Actual outside diameter and tolerance, not only a label such as “2 inch” or “3 inch”
- Marked standard, wall series, pressure class, and pipe material
- Batch or lot number, manufacturing date, and purchase invoice
- Installation date, buried or exposed location, and nearby supports or clamps
- Operating pressure, pressure-test result, fluid temperature, and any pump start-up or water-hammer event
- Joint type and fitting names, including socket, threaded adaptor, valve, elbow, tee, or rubber-ring connection
- Solvent-cement brand and batch, primer use, gasket identification, insertion depth, and curing time
- Exact failure position: pipe wall, socket, thread, gasket, fitting, or clamp
Do not discard a split, pinhole, cracked fitting, loose seal, or cemented joint until it has been photographed, labelled, and retained. A longitudinal split points the investigation toward impact, stress, chemical exposure, ultraviolet damage, or pressure; a socket leak points toward contamination, poor insertion, misalignment, inadequate cement, or a damaged seal.
Tell Geeta Plasticwood Industries whether the pipe carried drinking water, drainage, irrigation water, or another fluid. A pipe or jointing product accepted for conduit or non-pressure drainage is not automatically suitable for potable water; request the stated intended use, applicable Indian Standard, and supporting test evidence.
Related products
 | 2 Inch UPVC Pipe Product Details: Length of Pipe 3 m Size/Diameter 2 inch Working Pressure 3 kg/sq2 Usage/Application Plumbing Pipe Class Schedule 80 Color White 2... View product → |
 | 3 Inch UPVC Pipe Size/Diameter 3 Inch Working Pressure 4 kg/sq2 Usage/Application Industrial Pipe Class Schedule 40 Color White 3 Inch UPVC Pipe is a type of rigid... View product → |
Prevent repeat leaks through correct sizing, jointing and support
A sound pipe still leaks when the selected dimensions, joint, or support do not match the installation. Do not order a 3 inch UPVC pipe in Nagpur by its inch label alone: confirm the actual outside diameter, tolerance, wall series, pressure class, joint type, and applicable Indian Standard.
A leak proof PVC pipe in Nagpur is a system outcome, not a material claim.
| Mistake | Why it leaks | Correct choice |
|---|---|---|
| Nominal size only | A coupler or valve from another sizing system leaves a poor sealing fit | Match actual outside diameter and tolerance |
| Under-rated pipe or fitting | Operating pressure or surges exceed the pressure class | Match the pipe, fittings and valves to working and transient pressure |
| Dirty, wet or short socket joint | Solvent cement cannot form a continuous bond | Cut square, deburr, clean, dry, apply compatible cement and insert fully |
| Misaligned or unsupported run | Bending and thermal movement pull joints apart | Align the run and support it without forcing the socket |
| Pipe stored in heat or dragged over sharp edges | Softening, scoring or impact creates delayed failures | Shade the pipe, support it evenly and protect it during handling |
Use the joint method specified for the product. A solvent-welded socket needs full insertion and curing time; a rubber-ring joint needs a clean groove, undamaged seal, correct lubricant and straight insertion. Do not substitute threaded fittings, cement or gaskets without checking compatibility.
Add supports near valves, tees and changes in direction, where concentrated loads otherwise stress the nearest joint.
Repair the damaged section and prove the line is tight
Do not patch a crack, pinhole, or crushed wall with solvent cement. Cut out the damaged length and install a correctly sized replacement using two couplers or a purpose-designed repair coupling.
Confirm the actual outside diameter, wall series, pressure class, joint type, and Indian Standard; “2 inch UPVC pipe in Nagpur” and “3 inch UPVC pipe in Nagpur” are not sufficient descriptions for choosing a coupler or valve.
1. Isolate the repaired section with sound caps or valves, then remove trapped air through the highest outlet. Fill it slowly with clean water. Never use compressed air for a pressure test because stored air energy can turn a failed fitting into a projectile.
2. Use a calibrated pressure gauge and apply the test pressure specified by the pipe, joint, and installation standard. Follow the solvent-cement manufacturer’s curing time before pressurising; cold, damp conditions can extend the required cure.
3. Hold the pressure for the specified test period while checking every coupler, socket, elbow, tee, valve connection, threaded adaptor, and exposed pipe surface. Mark any bead of water, gauge movement, bulging, or seepage.
4. If pressure falls beyond the permitted limit, depressurise, correct the fault, allow fresh joints to cure, and repeat the complete test. Do not hide a leak by tightening a clamp or adding external cement.
Record the test pressure, duration, gauge identification, repaired location, jointing materials, and result. For drinking-water service, flush and disinfect the line only with products and procedures approved for that use before reopening it.
Frequently asked questions
What should you do first when a PVC plumbing pipe leaks?
Close the isolation valve, stop the pump, switch off nearby electrical equipment, release trapped pressure through a downstream tap, and photograph the leak before cleaning it.
How can you tell whether a PVC pipe wall or joint is leaking?
Dry the area and observe where water reappears. A split, pinhole, whitening, bulge, or crack in the pipe indicates wall damage; water emerging at a socket, thread, valve, or fitting indicates a connection failure.
What evidence helps a manufacturer identify the cause of a PVC leak?
Send clear photographs, pipe diameter and class, batch or marking details, operating pressure and temperature, installation date, jointing method, support spacing, and any repair history.
How do you prove a repaired PVC line is tight?
Replace the damaged section, allow solvent-cement joints to cure according to the product instructions, fill and vent the line, then conduct a controlled pressure test while checking every joint and fitting.
Keywords